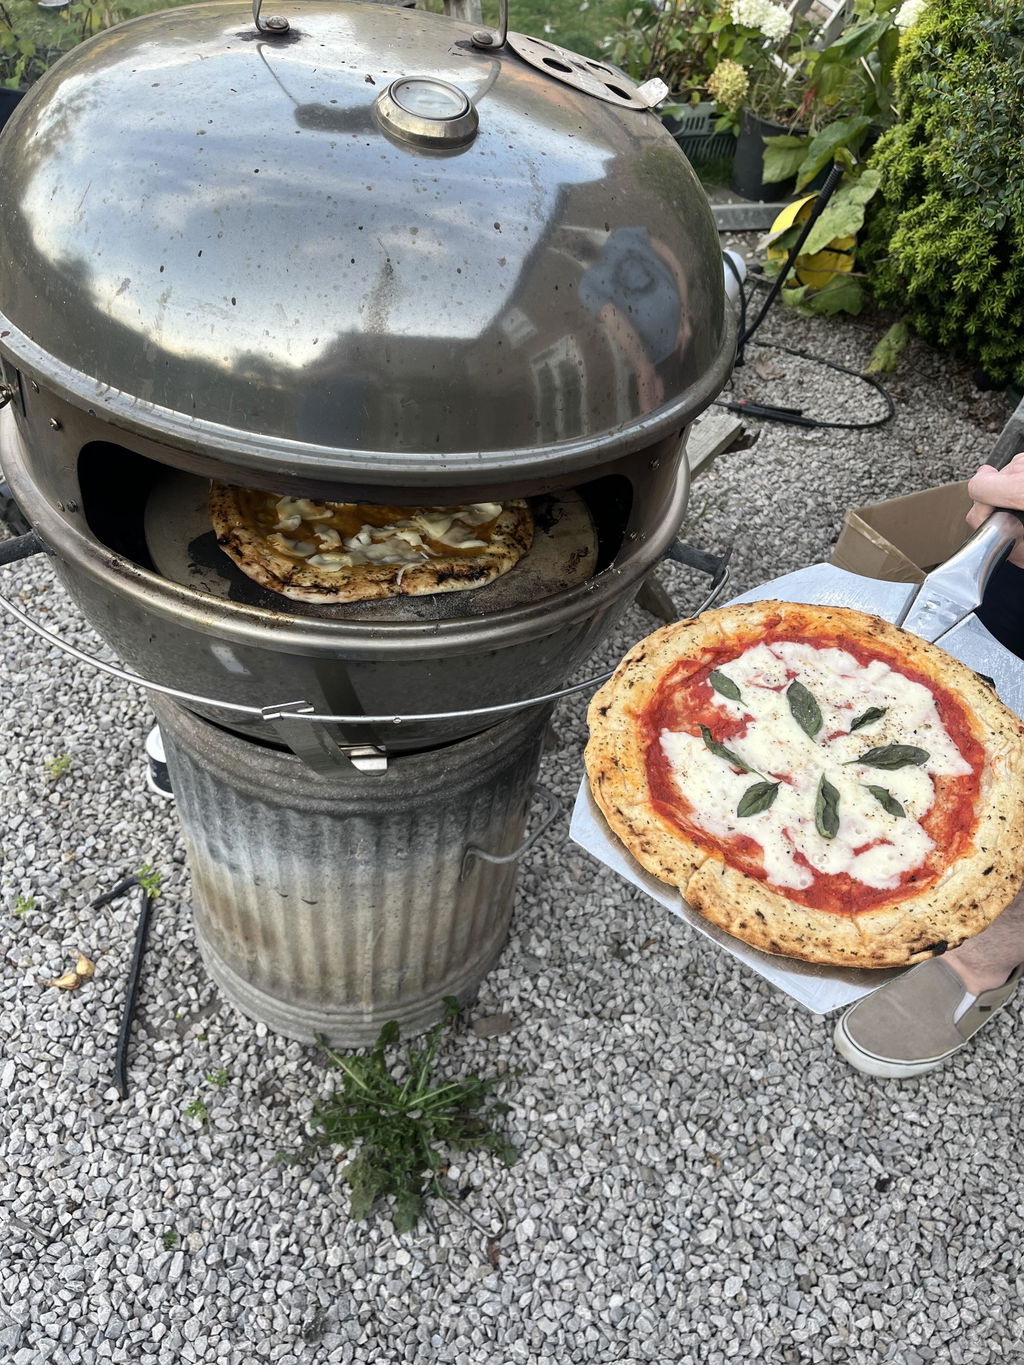
The Best Fridge Time for Pizza Dough: 48 to 72 Hours
Discover the ideal fridge time for pizza dough—48 to 72 hours—unlocking rich flavor and perfect texture for your homemade pizzas.
Cold fermentation for a couple of days in the fridge is the window that turns flat, one-note dough into something with real character. Cold fermentation slows the yeast down without stopping it, which gives enzymes time to break starches into sugar and gluten time to relax into something stretchy instead of tight and springy back at you. Refrigerated dough stays usable for several days if you’re careful, but the flavor and texture payoff peaks well before then.
A few adjustments depending on your plan:
- Making dough today, baking tomorrow? Even 24 hours beats same-day dough, though it won’t taste as complex.
- Want maximum flavor with minimal risk? Land in the 48 to 72 hour range. This is the target most home bakers should aim for.
- Need to hold dough longer than 5 days? Freeze it instead of pushing the fridge past its safe limit.
- Doing a long ferment (4+ days)? Cut your yeast to a fraction of a normal recipe so the dough doesn’t blow past peak fermentation before you’re ready to bake.
Key Takeaways
The 48 to 72 hour fridge window gives pizza dough its best balance of flavor, texture, and structural integrity, with five days as the outer safe limit.
| Point | Details |
|---|---|
| Sweet spot window | Refrigerate dough 48 to 72 hours for peak flavor and easy handling. |
| Safe maximum | Dough stays usable up to 5 days, but expect increasing sourness and fragility. |
| Storage method | Oil the surface, seal airtight, leave room for expansion, and label with the date. |
| Spoilage signs | Discard dough with mold or a rotten smell; sour tang alone just means over-fermentation. |
| Freeze past day 5 | Freeze dough for up to 3 months if you won’t use it within the safe fridge window. |
| Ready-made option | Doughdorks sells 48-hour fermented dough balls and bases for cooks skipping the wait. |
Table of Contents
- What Happens to Pizza Dough During Cold Fermentation
- How Long to Refrigerate Pizza Dough: A Day-By-Day Timeline
- How to Store Pizza Dough in the Fridge the Right Way
- Signs Your Pizza Dough Has Gone Bad or Over-Fermented
- How Long to Let Dough Rest After the Fridge (The 2-Hour Rule)
- Can You Freeze Pizza Dough Instead of Refrigerating It?
- A 10-Day Fridge Fermentation Test: What Actually Changes Day By Day
- Practical Fridge Habits Worth Building
- Where to Get Ready-Made 48-Hour Fermented Dough
- Sources
What Happens to Pizza Dough During Cold Fermentation
Yeast doesn’t stop working in the fridge, it just slows way down. At standard refrigerator temperatures, yeast activity drops to a crawl, which is exactly the point: instead of doubling in two hours and overproofing on your counter, the dough ferments gradually over days, building flavor compounds that fast fermentation never has time to produce.
Two enzyme families are doing the real work here. Amylase breaks down starch molecules into simple sugars, which is why long-fermented dough browns faster and develops those dark, leopard-spotted char marks in a hot oven. Protease enzymes attack the protein bonds in gluten, gradually loosening the dough’s structure. In small doses over 48 to 72 hours, this makes dough easier to stretch and shape. Left unchecked past day 5 or 6, the same enzyme keeps working and the dough goes from extensible to structurally weak.
Three variables control how this plays out in your kitchen:
- Fridge temperature. A fridge running at 34 degrees Fahrenheit ferments dough noticeably slower than one sitting at 40. If your dough is consistently ready too early or too late, check your fridge’s actual temperature, not just the dial setting.
- Yeast quantity. More yeast means faster fermentation and a shorter usable window. Less yeast stretches the timeline out.
- Flour strength. Higher protein flours, like Italian 00 flour milled for long ferments, hold their structure longer than weaker all-purpose flour, which breaks down faster under sustained enzyme activity.
Pro Tip: If you’re planning a ferment longer than 48 hours, drop your instant yeast down to roughly 0.1 to 0.3 percent of your flour weight. A standard same-day recipe uses far more yeast than that, and it will overferment and turn slack and sour well before day 3 if you don’t scale it back.
How Long to Refrigerate Pizza Dough: A Day-By-Day Timeline
Pizza dough fridge time isn’t a single number, it’s a curve. Flavor builds steadily through day 3, holds reasonably well through day 4, then starts trading quality for risk. Here’s roughly what to expect at each stage, assuming a standard fridge temperature and a moderate yeast percentage.
| Fridge Time | Flavor and Texture | Handling Notes |
|---|---|---|
| 12 to 24 hours | Mild flavor, close to same-day dough | Easy to shape, minimal complexity |
| 24 to 48 hours | Noticeably improved depth, slight tang | Good balance of ease and flavor |
| 48 to 72 hours | Peak complexity, better browning, relaxed gluten | Sweet spot for most home bakers |
| 48 to 72 hours | Increasingly sour, more extensible | Handle gently, may feel slack |
| 4 to 6 days | Pronounced acidity, weaker structure | Risk of tearing, best for experienced bakers |
Baking Steel’s own testing lines up with this curve almost exactly, pegging the true sweet spot around 72 hours, where cold fermentation has developed real flavor complexity without yet compromising the dough’s ability to hold its shape. Beyond that point you’re trading structure for tang, and not everyone wants that trade.
What actually shifts these numbers around:
- A colder fridge pushes every stage later; a warmer one pulls them earlier.
- Higher yeast percentages compress the whole timeline, so a dough made for same-day use will overshoot the sweet spot by day 2.
- Stronger flour, the kind milled specifically for extended ferments, tolerates the far end of this timeline better than a soft, low-protein flour will.
How to Store Pizza Dough in the Fridge the Right Way
Storage mistakes are the most common reason people give up on cold fermentation. Dough that dries out, sticks to its container, or explodes past its lid isn’t a fermentation failure, it’s a storage failure, and it’s completely avoidable.
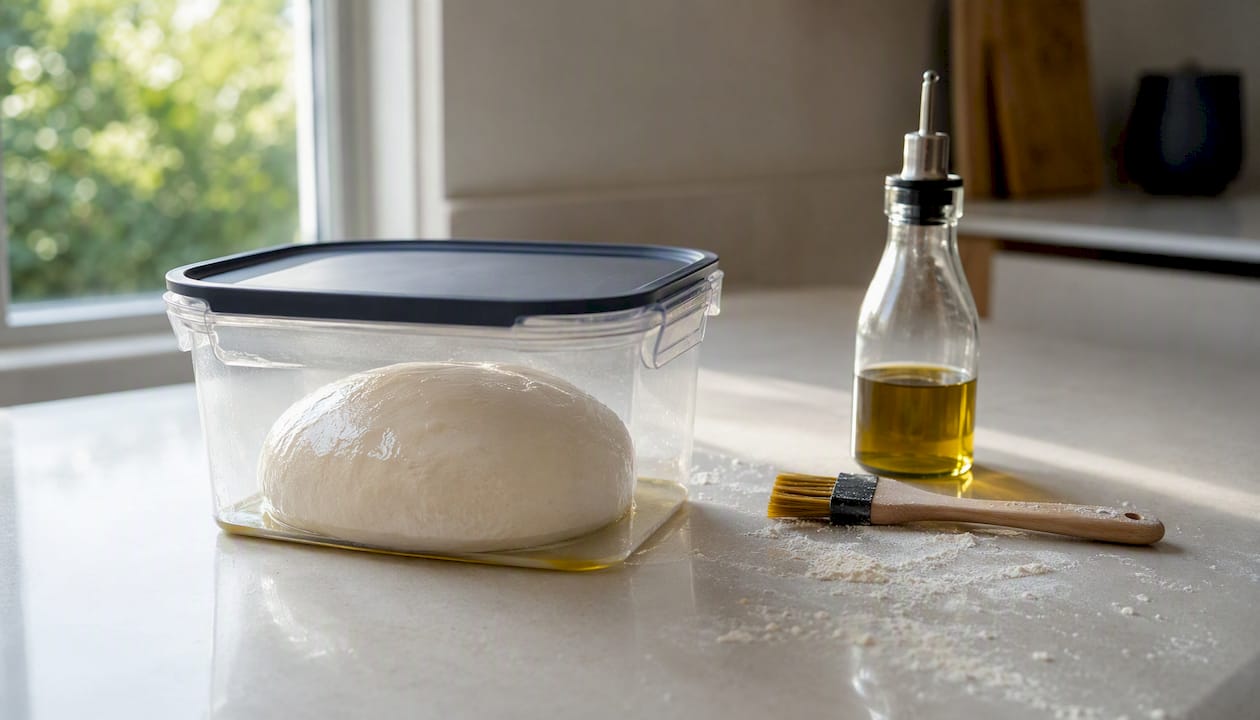
Start with the container. An airtight tub with a snug lid works better than plastic wrap, which tends to peel loose as the dough expands and lets the surface dry into a crust. A lightly oiled zip-top bag is a fine alternative if you’re short on tubs, just press out the air before sealing. Whatever you use, rub a thin coat of olive oil over the dough’s surface first. It stops a skin from forming and makes the dough easier to release later.
Room for expansion matters more than people expect. Dough left to bulk ferment as one mass will roughly double, so give it a container at least twice its starting volume. If you’re dividing into individual balls before refrigerating, each one needs its own space too, since balls that touch will fuse together and tear when you try to separate them.
A quick pre-fridge checklist:
- Oil the dough’s surface lightly before sealing it away.
- Divide into balls if you’re planning to bake portions on different days.
- Label the container with the date, since a day or two blurs together fast in a busy fridge.
- Confirm your fridge is actually running cold, ideally in the mid to high 30s Fahrenheit.
Pro Tip: Try the 24+24 method: bulk ferment the dough for 24 hours, then divide it into individual balls and refrigerate those for another 24 hours. Splitting the ferment this way tends to produce a better final structure than one uninterrupted 48-hour bulk chill, because the gluten network reorganizes itself when you shape the balls partway through.
Signs Your Pizza Dough Has Gone Bad or Over-Fermented
There’s a real difference between dough that’s simply reached the far edge of its usable window and dough that’s actually spoiled. Confusing the two either wastes good dough or, worse, puts something questionable into your oven.
Over-fermented dough is still safe to eat, it just won’t perform well. Watch for these signs:
- A sharp, distinctly sour or alcohol-like smell, well past the mild tang you’d expect around day 3.
- Extreme stickiness that makes the dough nearly impossible to shape without adding excessive flour.
- Little to no spring when you poke it, meaning the gluten structure has weakened past the point of holding air.
- A flat, deflated appearance instead of the slight domed puff you’d see on fresher dough.
Actual spoilage is a different problem entirely, and it means the dough goes in the trash, no exceptions. Visible mold, in any color, or a smell that’s genuinely rotten rather than just sour, means discard it immediately. Do not try to salvage dough with mold by cutting around it, the way you might with a hard cheese.
The poke test is the fastest way to check where your dough stands. Press a finger into it about half an inch deep. Dough that springs back slowly and partially is in good shape, right in that 48 to 72 hour window most bakers are aiming for. Dough that doesn’t spring back at all, and instead holds the dent, has likely crossed into over-fermented territory, though it’s often still bakeable if you handle it gently. A faint vinegar note at this stage is normal and even pleasant; a smell so sharp it makes you wince is your signal to either bake it immediately or let it go.
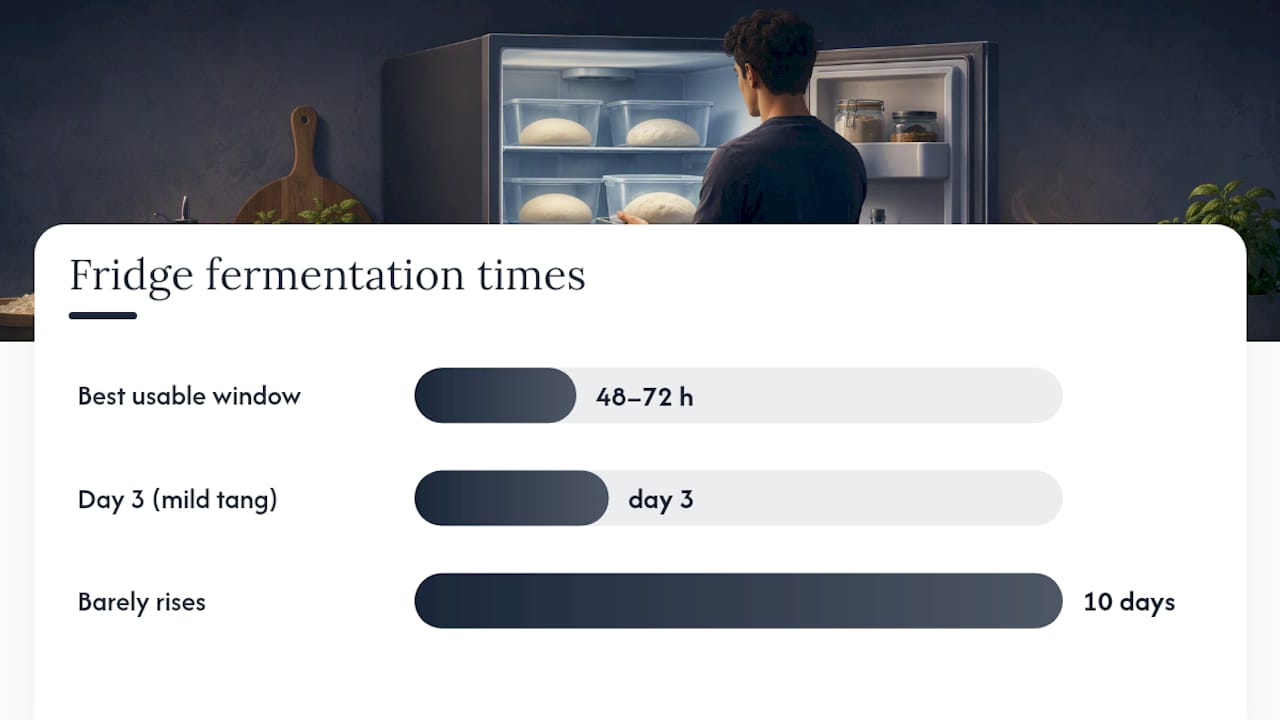
Serious Eats ran a version of this exact test, baking a sample of the same dough every day for ten days straight. Quality held strong through several days, started slipping later, and the dough could barely rise after over a week of cold fermentation.
How Long to Let Dough Rest After the Fridge (The 2-Hour Rule)
Cold dough straight from the fridge is tight, cool, and resistant to stretching. Give it somewhere between 30 minutes and 2 hours at room temperature before you try to shape it, with the exact time depending on how long it fermented and how cold your kitchen is.
Here’s how that plays out for the three most common scenarios:
- 48-hour dough. Pull it out, let it sit covered at room temperature for about 90 minutes to 2 hours. This is enough time for the gluten to relax and the yeast to wake back up slightly before you shape.
- 72-hour dough. This dough is already more extensible from the longer ferment, so it often needs less bench time, closer to 60 to 90 minutes. Watch it more closely since it’s more delicate.
- Beyond 72 hours, fragile dough. Handle it as gently as possible and keep the rest closer to 30 to 60 minutes. Longer resting on already-weakened gluten increases the risk of tearing when you stretch it.
To check readiness, press two fingers into the dough gently. If it springs back slowly and leaves a slight indent, it’s ready to shape. If it resists entirely and feels tight, give it another 15 to 20 minutes. If it’s already slack and doesn’t spring back at all, move straight to shaping rather than letting it warm further.
The full sequence, start to finish:
- Remove dough from the fridge and keep it covered.
- Let it rest at room temperature per the timing above.
- Run the poke test to confirm readiness.
- Shape gently, working from the center outward, avoiding excess flour on the bench.
- Give the shaped dough a final 10 to 15 minute rest before topping and baking.
Can You Freeze Pizza Dough Instead of Refrigerating It?
Freezing is the right call the moment you know you won’t use dough within five days. Properly wrapped pizza dough holds up well in the freezer for up to three months, which makes it a far better option than pushing a fridge ferment past its safe window and hoping for the best.
Prep is straightforward. Divide the dough into individual balls before freezing rather than freezing it in one mass, since a single frozen block is much harder to thaw evenly. Wrap each ball tightly in plastic, then place it in a freezer bag or airtight container to guard against freezer burn. Label it with the date, because “sometime last winter” isn’t a useful timestamp when you’re planning dinner.
Thawing takes patience. Move the dough from the freezer to the fridge the night before you plan to bake, letting it thaw slowly over 12 to 24 hours. Once thawed, treat it like fridge dough: give it a room temperature rest before shaping, following the same bench-time guidance above. Skip the microwave or any rapid-thaw shortcut, uneven heat kills yeast activity in spots and leaves you with a patchy rise. If you want a full walkthrough of the wrapping and thawing process, Dough Dorks covers it step by step.
One honest note: frozen and thawed dough is rarely quite as lively as fresh fridge dough. The freeze and thaw cycle kills off a portion of the yeast population, so give thawed dough a slightly longer proof than you normally would, and don’t be surprised if the rise is a touch less dramatic.
A 10-Day Fridge Fermentation Test: What Actually Changes Day By Day
To see the sweet spot in action rather than just describe it, imagine running the same test bakers and food writers have repeated for years: one batch of dough, divided into ten identical balls, each refrigerated at the same temperature and baked on its own day, from day 0 through day 10, using the same oven and bake time throughout.
The pattern that emerges is consistent enough that it’s become something close to conventional wisdom among pizza obsessives.
| Day | Rise and Handling | Flavor and Aroma |
|---|---|---|
| 0 to 1 | Strong rise, easy to shape, minimal aroma | Mild, yeasty, almost bread-like |
| 2 | Good rise, slightly more relaxed | Noticeably rounder flavor starting to emerge |
| 3 | Excellent rise, easy stretch, good leoparding | Complex, balanced tang, best all-around bake |
| 4 to 5 | Still strong, slightly more extensible | Deeper tang, still very pleasant |
| 6 | Rise starts weakening, dough feels slacker | Sharper sourness creeping in |
| 8 to 10 | Poor rise, fragile and sticky | Overly sour, sometimes boozy notes |
Day 3 consistently comes out as the best all-around bake in tests like this, with the strongest leoparding on the crust and a flavor complex enough to notice but not so sharp it overwhelms your toppings. Days 4 and 5 hold up nearly as well. By day 6, the decline becomes obvious even to a casual taster, and it accelerates from there, matching what Serious Eats found in its own multi-day cold fermentation testing.
Your own results will shift depending on your fridge and your flour. A fridge running a few degrees colder than average stretches this whole timeline out, and a stronger flour holds its structure a day or two longer than a softer one would. Run this test yourself with your own fridge and flour once, and you’ll know exactly where your personal sweet spot sits.
Practical Fridge Habits Worth Building
The details that make the biggest difference in day-to-day baking are usually the boring ones. Labeling every container with the date it went into the fridge sounds obvious, but skip it twice and you’ll be guessing at fermentation age based on smell alone, which is a bad habit to get into.
Dropping the yeast percentage for anything beyond a 48-hour ferment matters more than most recipes let on. Dividing dough into individual balls after the first 24 hours, rather than leaving it in one bulk mass the whole time, tends to give a more even final texture and makes portioning far less messy on baking day. And on the bench: resist the urge to keep adding flour when dough feels sticky during shaping. A little tackiness is normal for well-fermented dough, and over-flouring it toughens the crust and mutes the flavor you spent three days developing.
None of this needs to be treated as rigid law. Fridge temperatures vary, flours vary, and a Tuesday-night dough doesn’t need the same precision as one you’re serving to guests. Track your results for a few batches and you’ll figure out your own version of the sweet spot faster than any guide can hand it to you.
There’s also a legitimate case for skipping the whole process. If a busy week means you won’t get the timing right, reaching for a properly cold-fermented, ready-made dough ball beats rushing a from-scratch batch that never gets the time it needs.
Where to Get Ready-Made 48-Hour Fermented Dough
Not every week allows for a three-day fermentation schedule, and that’s exactly the gap Doughdorks was built to fill. Doughdorks makes the 48-hour cold ferment for you, using Italian 00 flour, fresh yeast, and extra virgin olive oil, so you skip the multi-day wait and still get the flavor and texture that long fermentation produces.

The dough arrives already at its sweet spot, no timing charts or poke tests required. Doughdorks sells its 48-hour Neapolitan dough by weight for cooks who want to portion their own balls, alongside ready-formed dough ball packs and pre-cooked Neapolitan bases for anyone who wants pizza on the table with almost no prep. Once it arrives, keep it refrigerated and use it within the same short window you’d give any fresh-fermented dough, ideally within a couple of days for the best texture, or freeze it if you need more time.
If you’ve read this far because the idea of tracking fridge days and yeast percentages sounds like more effort than you want to spend on a Tuesday, order a batch of ready-made dough and let the fermentation schedule be someone else’s problem for a change.
Sources
Readers who want to dig deeper into the science and testing behind these timelines can check a few sources directly:
- The Pizza Lab: How Long Should I Let My Dough Cold Ferment? | Serious Eats
- How Long Does Pizza Dough Last in the Fridge? | Baking Steel
- How to store pizza dough | MasterClass
- How Long Can Pizza Dough Stay in the Fridge? | JayArr Pizza
- Pizzastunde
Your own fridge, flour, and yeast brand will nudge these numbers slightly one way or another, so treat every timeline here as a strong starting point rather than a fixed rule.
Recommended
- Why 48 Hour Pizza Dough Benefits Matter - Dough Dorks
- Can Pizza Dough Be Frozen? Yes - Here’s How - Dough Dorks
- 48-Hour Neapolitan Pizza Dough Balls (20 box) | Dough Dorks
- 48-Hour Double Fermented Ready Made Neapolitan Pizza Dough Balls (Box of 12)
READY-MADE • FROZEN • UK DELIVERY
Skip the mixing. Keep proper dough in your freezer.
48-hour fermented, individually proofed in their own pot and delivered frozen across the UK. Defrost, stretch, top and bake.
-
 48-Hour Neapolitan-Style Pizza Dough Balls – Box of 12
£22.88
48-Hour Neapolitan-Style Pizza Dough Balls – Box of 12
£22.88
-
 48-Hour Neapolitan-Style Pizza Dough Balls – Box of 20
£32.30
48-Hour Neapolitan-Style Pizza Dough Balls – Box of 20
£32.30
-
 48-Hour Neapolitan-Style Pizza Dough Balls – Box of 8
£18
48-Hour Neapolitan-Style Pizza Dough Balls – Box of 8
£18
Handmade in Dorset • Free UK delivery over £50 • Free proofing pot with every dough ball